Using blur to tell a story — or to add another element to a story.
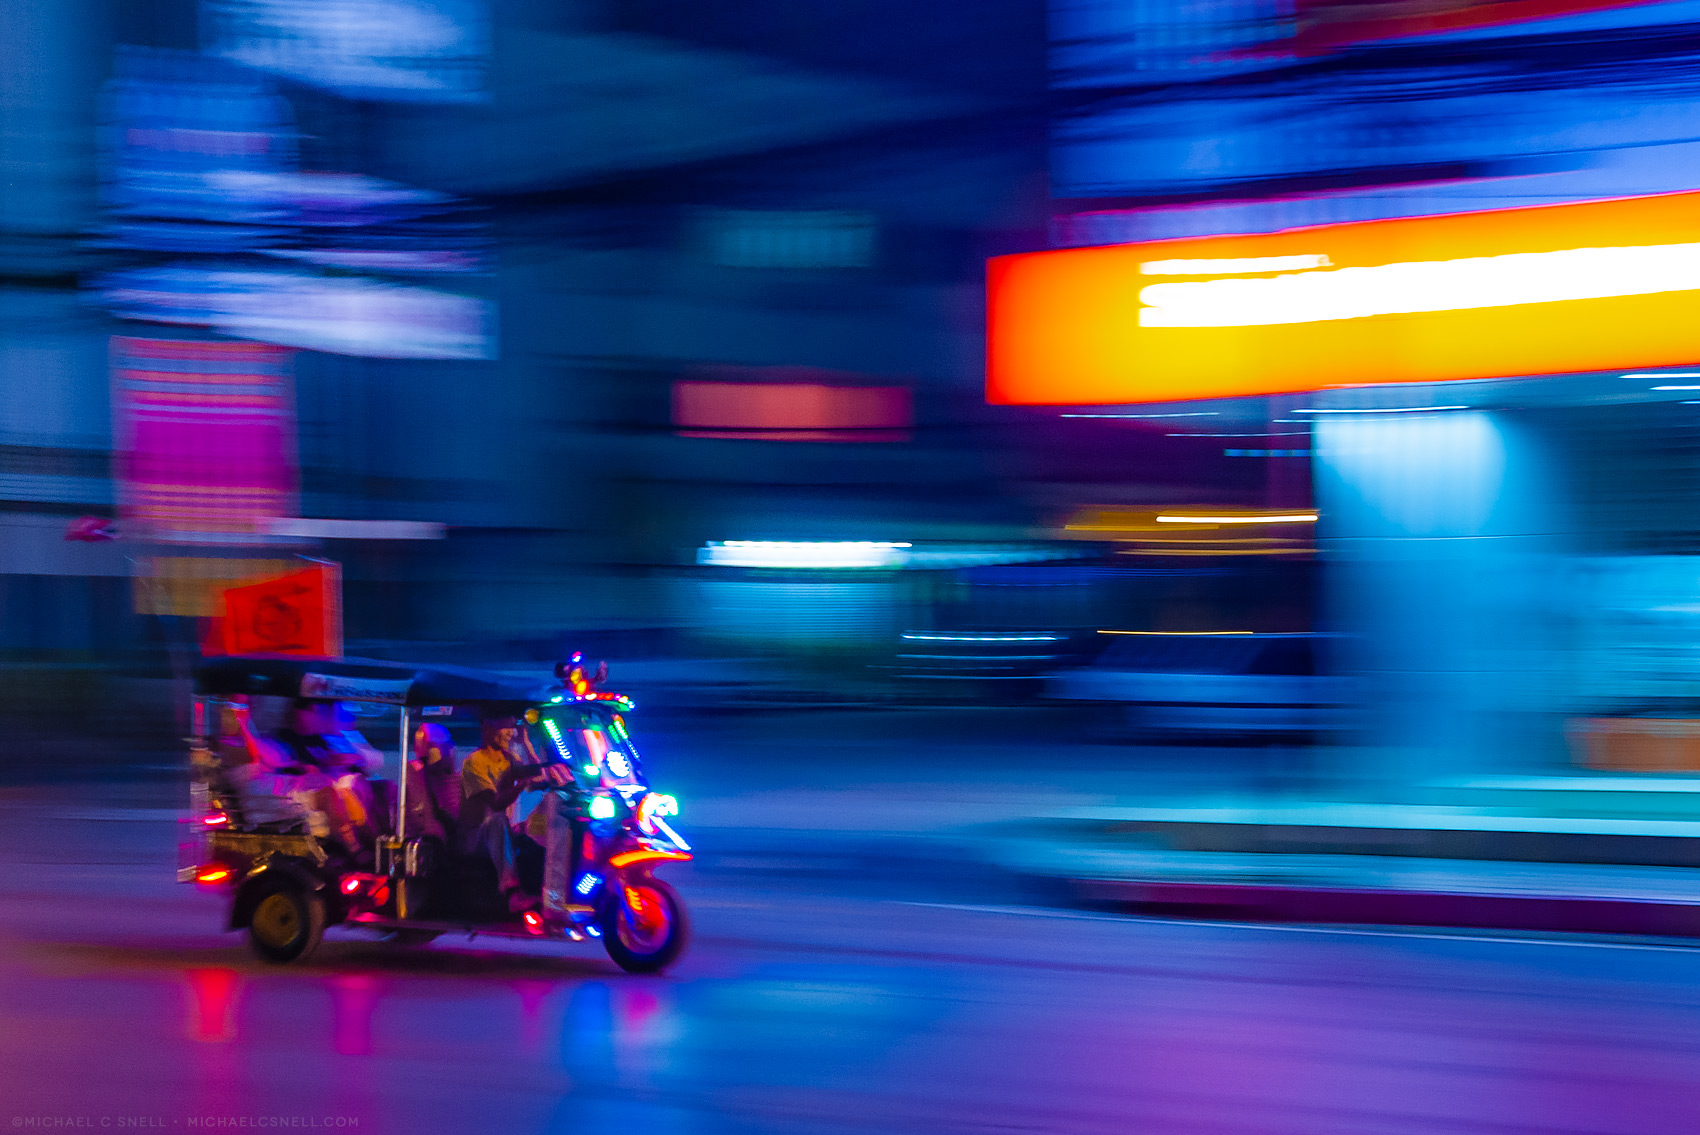
For this post I’m going back to an evening in March, 2010. My first day spent in Chiang Mai, Thailand. It had been a full day of touring, making images of umbrella factories, tiger preserves, cooking schools, hotels, etc. At the end of it all, we visited a night market that wasn’t far from the hotel so, after shooting the market itself, I decided to walk back to the hotel.
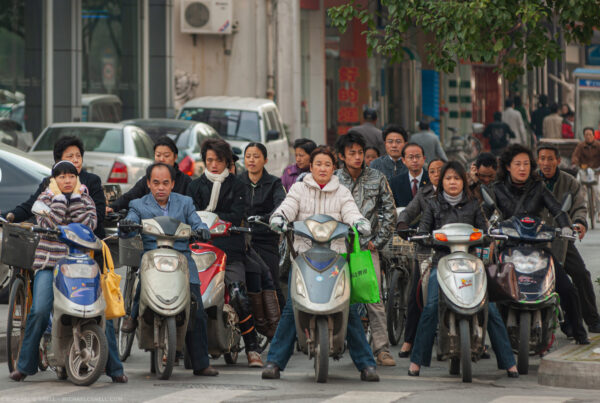
It might have been the punchiness of having been on long flights, but I decided to spend part of the walk home honing my panning skills. Panning at slow shutter speeds is a way of showing movement and action. You sacrifice some sharpness and detail for a sense of energy and motion. It takes some time to master, because you need just the right amount of blur, and enough sharpness that you can still tell what the subject of the shot is.
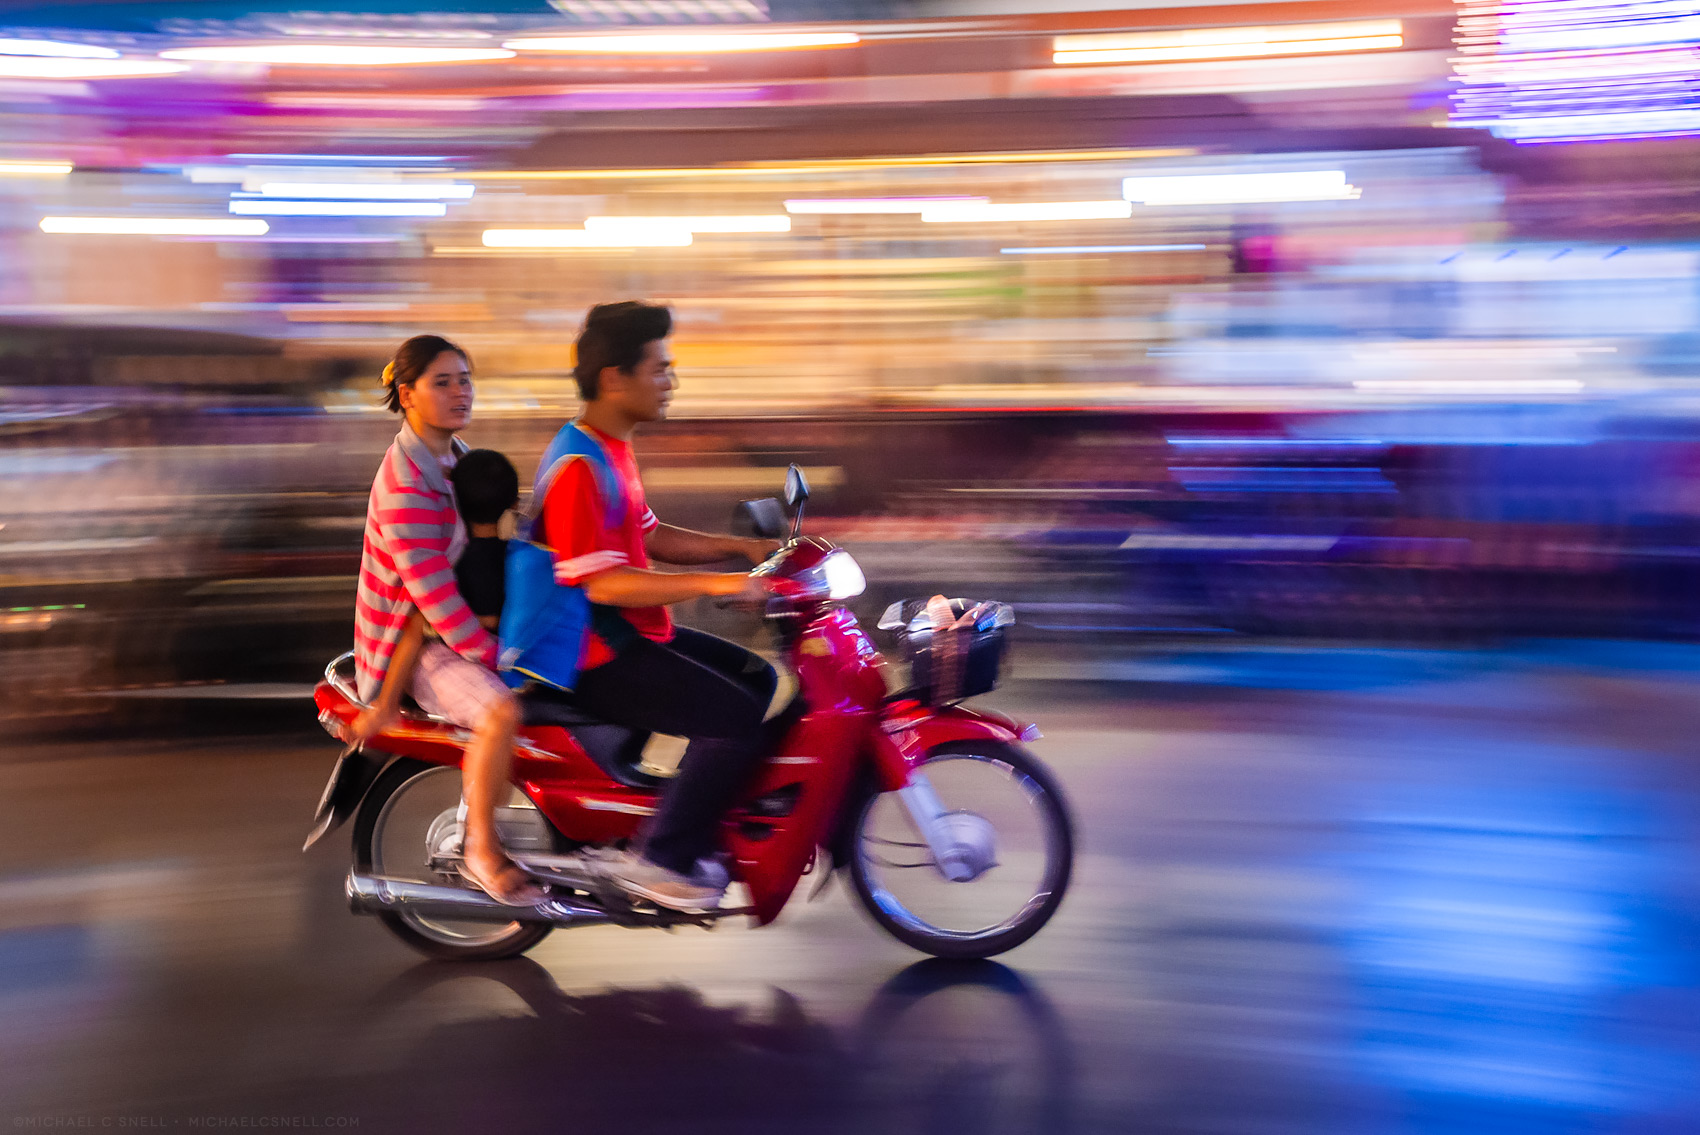
If memory serves, all of these images were taken along Changklan Road in Chiang Mai, Thailand, between the Night Bazaar and the Shangri-La hotel. My metadata tells me that all were shot at a 35mm focal length as well (on a 17-35mm zoom). 35mm feels about right to me for panning street scenes. It’s wide enough to give some background atmosphere, but not so wide as to create a swirling chaos of blur. Like with everything, though, your subject and tastes may differ.
From experience, I’ve found that — for action like city street traffic — a shutter speed of around 15 seconds gives me good results when panning. Thanks to the metadata in these files I can see that all of these images were shot at between 1/15th and 1/20th of a second. To achieve that, I was shooting at ISO 800 with an aperture of between 3.5 and 5. Shooting on shutter priority is a good way of doing this. You can set your camera to the ISO and shutter speed that you desire, and the camera will choose the appropriate aperture. If you’re feeling more confident, you can shoot totally manually and select all three options yourself using trial and error. Thankfully, digital now gives us the ability to immediately see how successful our settings are so we can adjust on the fly.
So, with an exposure setting that seems to be working for you, now it’s time to think about focus. I often go manual here as well. I’ll preset my focus for the approximate distance to where I expect my subject to be, and I’ll leave it there. Just be sure you’re set to manual focus so that the camera doesn’t re-focus at a different point when you depress the shutter part way.
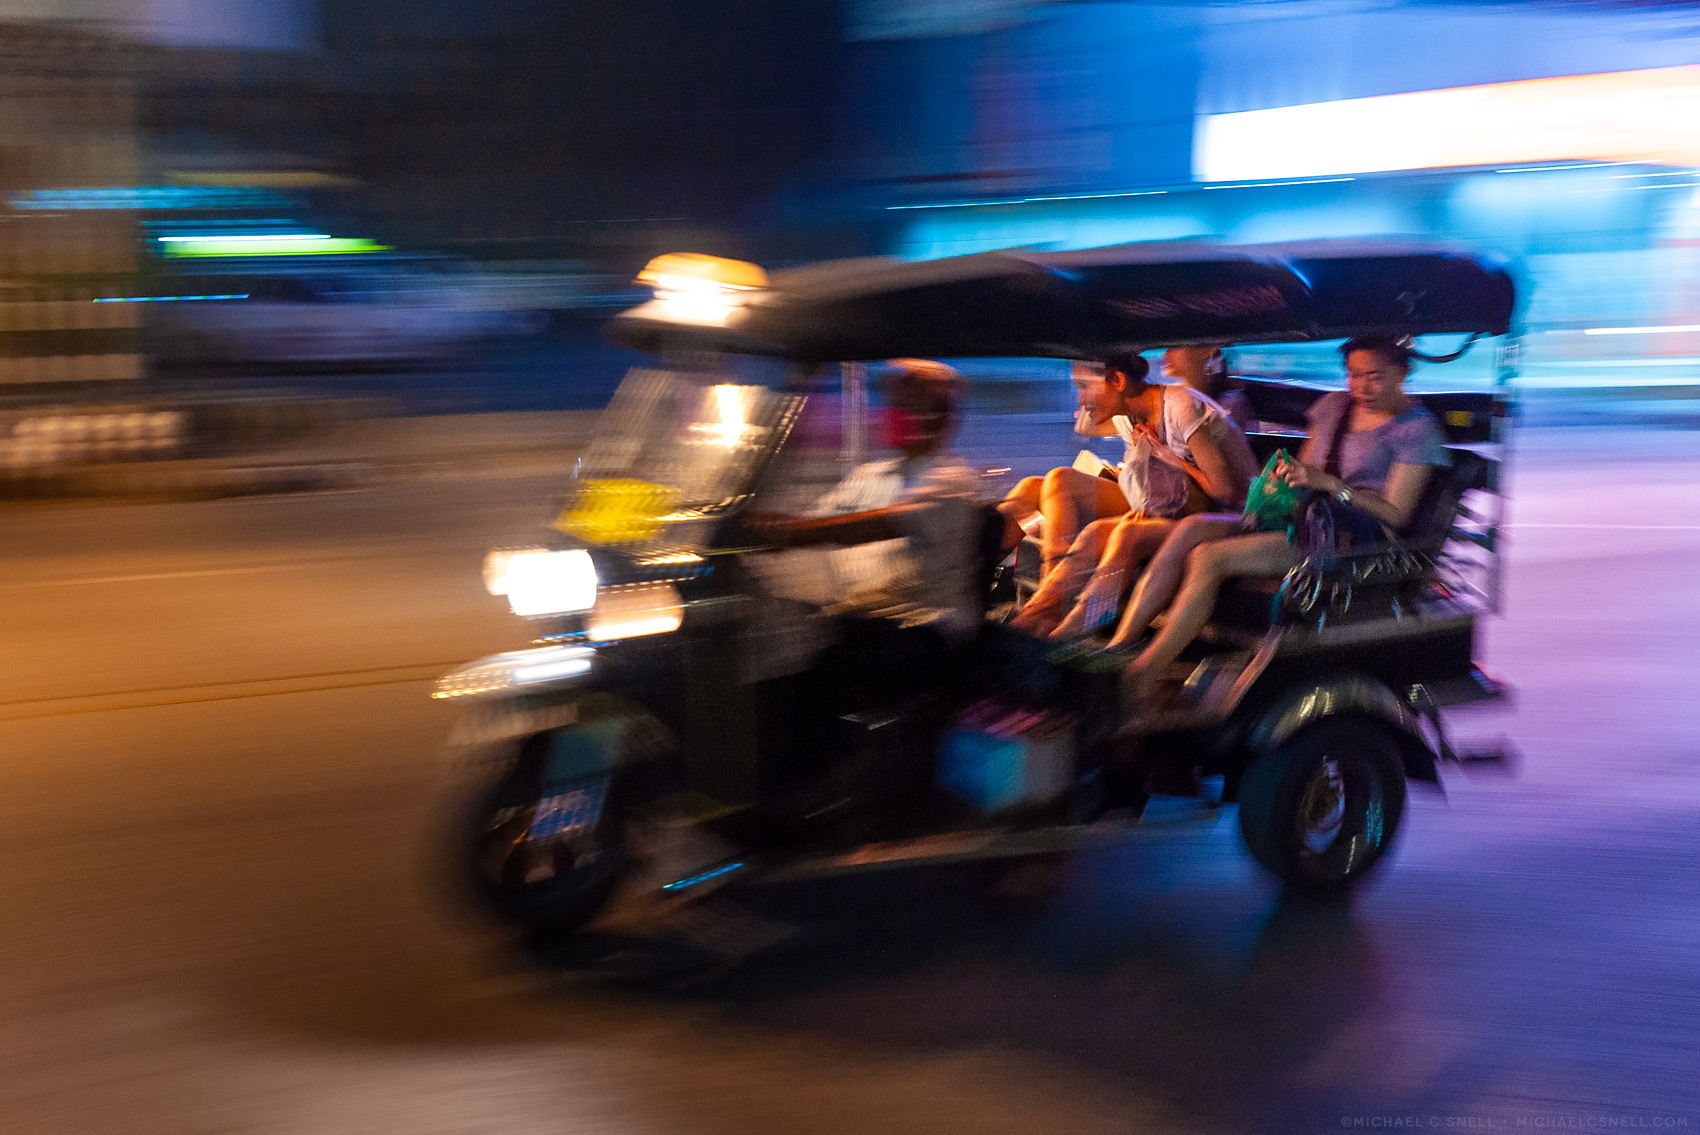
All that is left now is to get your shooting posture down. This is where you need to pre-visualize a bit. Figure out where your subject is going to be when you want to trip the shutter. In the case of my scooters and tuk-tuks, I wanted them to be coming toward me — not moving away — and nearly along side me so that I would be getting them almost in profile.
Position your body for a comfortable shooting stance at that location and angle, then swivel at the waist so that you can start tracking your subject before they get to your preferred position. Be sure that you can not only swivel far enough to be able to track your subject for a distance before your shot, but also be able to continue swiveling to have some follow through. Test the motion a few times to make sure it’s comfortable and steady, and reposition your feet if it’s not.
The goal is to have a fluid movement as your upper body twists to follow your subject, with the point of your shot coming roughly midway through the motion. This way you have time to steady and smooth the motion before you trip the shutter, and your motion continues so that you don’t stop moving until well after the shutter has closed.
The theory is, that because you are are following your subject and matching their speed, your subject will be moving less in your camera’s frame than the background that you are swinging past. That gives you a blurrier background and a less-blurred subject.
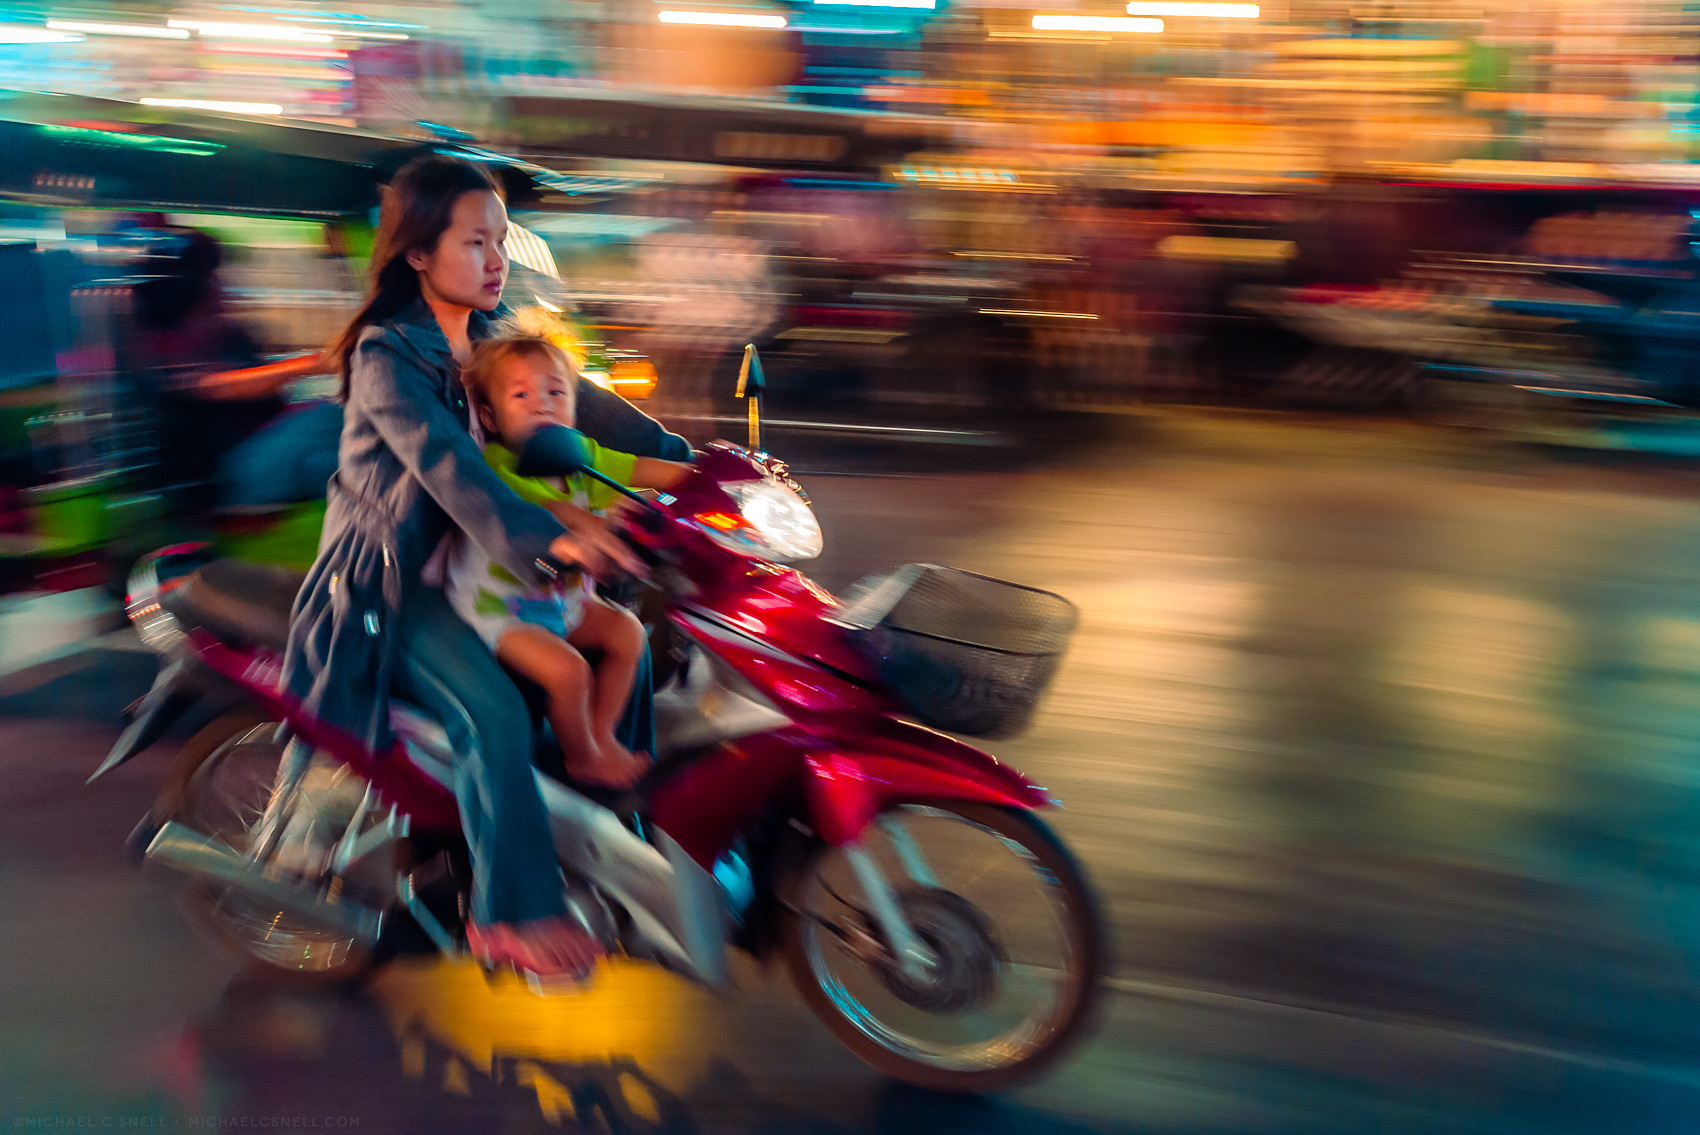
With traffic shots like this, I find I prefer the vehicle to be approaching in the shot, rather than moving away. Perfectly in profile sometimes works, too, but I like the effect of a slight angle better most of the time. Remember, too, that your shutter will be open for a longer time, too, so you might need to trip the shutter a little early so that you get the sweet spot mid-frame.
All of these are guidelines. Depending on your subject, how fast they are moving and what your background is, you might need to adapt. If your subject is walking, you might need a slightly longer shutter speed. If it’s a racing car, you can probably get away with a shorter shutter since more motion will take place in a shorter period of time.
My goal is to pan along with my subject well enough that you get some semblance of sharpness in the subject. The rest of the shot can be a dreamy swirl of color, but I typically want enough clarity to be able to distinguish the subject. That said, you can get some nice abstract effects if you abandon detail and focus entirely. I’ve seen great examples of this with birds in flight, for example.
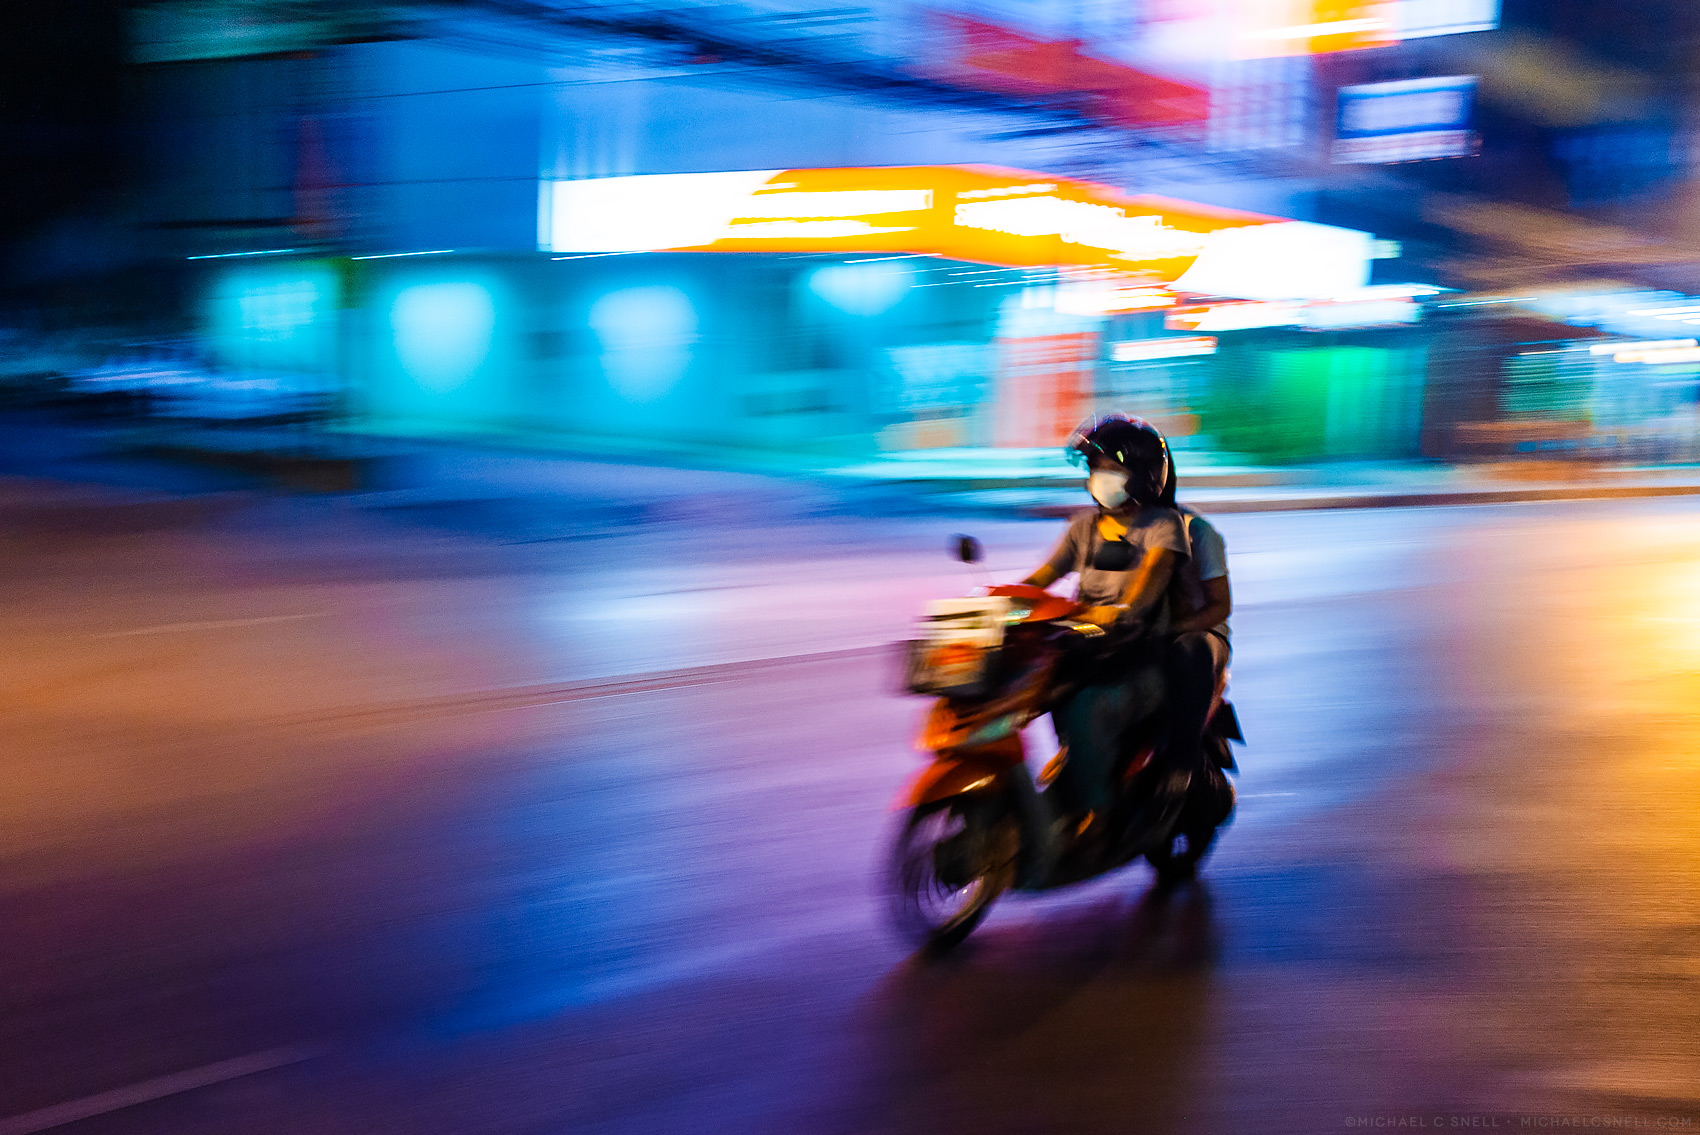
One last thought with urban panning shots like these from Chiang Mai is that your white balance can make a big difference in the scene. This street was full of lighting and signage in all different colors and color temperatures. You can either play with your white balance options in-camera to see what you like best, or shoot in auto white balance in RAW format and make the determination later when you process your images. Auto will make a “best guess” to balance all of those colors, but the RAW file will still give you the latitude to change it to whatever you want in processing.
Your own preference comes into play with this type of photography — how much blur you want, how much sharpness, what kind of color story, etc. Hopefully this post will give you the basics to try the technique out and then you can enjoy coming to your own conclusions on the best outcome. Like in much of photography, there is no single correct answer.