Category Archives: lenses

Rainy day strategies

[sponsored post]

Stewart Island lies off the southern tip of New Zealand’s South Island. In this shot we’re just over the peninsula from the Island’s one town, Halfmoon Bay, and are overlooking Golden Bay, Thule Bay and the Paterson Inlet. Today’s destination is Ulva Island — a small, 670 acre island in Paterson Inlet that is being restored to its original predator-free ecosystem.

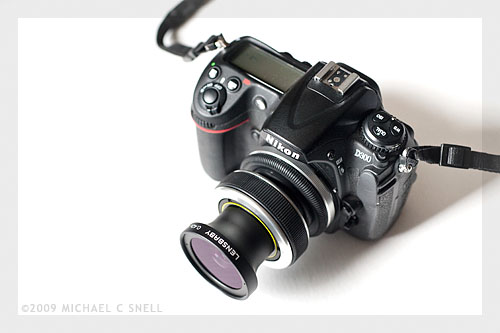
It’s also raining, which can make shooting photos during our walking tour challenging. I don’t have any waterproof housings but I do have a jacket and opt for a two body, two lens operation today. I’ll take the Nikon D700 with a 60mm macro lens and the D7000 with the Tamron 18-270. Here’s my thinking:

We’ll largely be in fairly dense rainforest where the reduced contrast of the overcast sky will actually help even out the light. I won’t want to include a lot of sky in any shots since it’s flat grey so I will instead focus on details — macro shots of the plants that we encounter on the walk. It will also allow me to shoot downward for the most part, eliminating the problem of rain getting on the front element of my lens. Neither camera-lens combination is large, so I can keep them both tucked into my partially zipped jacket and retrieve them only when needed. The second body with the 18-270 will be reserved primarily for those times when I encounter something that suddenly requires more than a prime 60. That might be a wide shot where the trail opens out onto a beach, or a telephoto shot of a bird. Birds are a large part of the visitor experience to Ulva Island so I hope to get something along those lines. By taking the 18-270 and a macro, I figure I’m set for nearly anything and I won’t have to deal with changing lenses in the rain.

Overall, this plan worked well. Once we made our way off of the beach and into the understory, the rain effect was lessened by the trees overhead, although the occasional drop that would land now was a much larger drop from a leaf than the small, misty raindrops on the beach. The trails wound through ferns and forgotten-looking plants that gave a real sense of what New Zealand must have once been like, before the main islands were largely cleared of trees for cultivation. I’ll show some of the macro shots in the next post but first I’ll show a couple of shots that made me thankful to have had the 270 end of the Tamron 18-270 zoom.

This tiny bird is a Toutouwai, or Stewart Island Robin. On the much larger end of the scale is this South Island KaKa:

A member of the parrot family, Kakas are about 18″ long and weigh a pound on average. That’s a pretty sizable bird. The Kaka didn’t come nearly as close as the Robin. There was another group a few yards ahead of us that he was curious about but the addition of our group coming up behind eventually proved too much and he took off. I was happy to get the images I did with the 18-270, but can only imagine the shots that a person could get with a little more time and patience on this island. For the most part, the birds are not that suspicious of people and will come fairly near. The haven’t really learned fear.

In the next post, I’ll share a few of the detail shots I took on this hike with the macro. Given the weather and limited time, I think the two lenses really allowed me to cover a lot of ground photographically speaking.

I should also mention one other foul-weather tip — the landscape at the top of this post (also shot with the Tamron 18-270) was fairly grey and colorless due to the overcast skies and impending rain. Once I brought it into Lightroom, I opted to alter the white balance to give the scene a cooler, blue cast. The result resembles the light you might get just before dawn or after sunset, even though it was shot near mid-day. Filters can also be used on-camera for this effect but, anymore, I prefer to leave my options open for playing with different color temperatures at the point of post-processing instead. By shooting in RAW, I have the ability to make several versions in different tones without any damage to the original image. One of the great benefits of today’s digital photography tools.

The 10 minute waterfall shoot

I spotted the potential problem when I was typing up my itinerary before even leaving for New Zealand. On the day that we would be driven down the coast from Dunedin to Invercargill, there would be a 10 minute stop to photograph Purakaunui Falls. That’s right — just 10 minutes.

I’ll take a moment here to explain my itinerary process. On a trip like this that incorporates a convention, board meetings, tours, etc., you are generally provided with a whole slew of itineraries. You get one for the board meeting, one for the convention, one for each specific selection you’ve made for activities during the convention, and on and on. The entire stack of itineraries — not to mention flight and ferry schedules — can end up nearly as thick as a phone book. The end result is a lot of weight and bulk to carry around and endless pages to thumb through whenever you’re trying to figure out what your next stop is. My solution is to take all of those itineraries before departure and to re-enter their core information into one, two-sided document that I can print a few copies of and stick them in coat pockets, camera bags, suitcases, etc. It’s my “at a glance” itinerary that gives me only the information that pertains to me and leaves out all of the schedules for things I’m not participating in. I also color-code items that need to stand out: meetings I’m running, professional development sessions I’m conducting, etc. These itineraries have become an essential part of my pre-trip planning, especially for trips like this where I’m not in control of my own schedule.

That’s a screenshot of one side of my “at a glance” itinerary for New Zealand. These things take a little time to assemble, but they are a huge help once on the ground.

A happy byproduct of this process is that I get to pre-visualize the entire trip as I put the schedule together. It’s an opportunity for things like this 10-minute waterfall stop to reveal themselves and allow me to think through how to make the most of the situation. I knew I was going to be mostly in cities and towns during my New Zealand trip so any opportunity to shoot a natural landscape was very important to me. A waterfall would make a nice addition to my overall coverage of this part of the South Island and I wanted to make the most of this stop — short as it might be.

I managed to get the front seat, next to the driver, the morning of the waterfall shoot. This can often take some elbowing on a press tour but, in this case, there was no front passenger door so you had to enter the van through the sliding side door and then scramble over the engine hump in order to access this particular seat. Not something most people found appealing, but worth it to me in order to be able to shoot through the windshield, be able to talk to the local driver, and have more room to have my tripod, etc. with me. I made a point of having the tripod easily available on this day — especially because of the waterfall stop.

Our driver was great and said that he’d made note of the 10-minute waterfall stop when he first saw the schedule as well. He knew the area and knew that that amount of time wouldn’t work at this particular location. He’d made some adjustments to the schedule in order to give us 30 minutes at the waterfall because he knew the hike to the falls would take a good 10 minutes itself. With his adjustment, we’d still have 10 minutes at the falls with an additional 20 minutes for the 10 minute walk down and the 10 minute walk back.

When the waterfall was to be the next stop, I made sure to prepare my gear. I set out my tripod and put the mount on my Nikon D700 — I was going to use it along with my Nikkor 17-35mm wide-angle zoom. I believe I also tossed a couple of longer primes in the pockets of my Scottevest, just in case the overlook to the falls was not as close as I anticipated it would be. I made sure to also pocket my ND and polarizing filters so that I could cut the light enough to get a long exposure that would let the falls get all misty and soft. The one thing I neglected to grab was my cable release. I got around this by shooting on timer, but I lost some precious seconds each time I had to wait for the timer to run out.

When the van stopped, I piled out as quickly as possible and headed down the trail at a fast walk — checking my watch so that I knew exactly when I’d have to start back. I never want to be the last one to return (that’s bad press trip karma) and I want even less to be left behind because I’m late. On the walk, I multi-task by extending my tripod legs and getting everything ready for the shoot. It takes almost 10 minutes exactly to get to the overlook and I take my “safe shot”, that’s at the top of this post, from that platform (By “safe shot” I mean that it’s a shot that ensures that I have something in the can, even if I don’t get anything else). I actually take a couple for safety and then start looking for more interesting angles. There’s a rocky area to the left that looks like it will afford a better angle and more interesting foreground potential so I start making my way around, over slippery rocks and logs. I stop every so often to take advantage of a new angle and fire off a couple more shots. Here is an animation made from two shots at one of these stops that gives a little sense of the motion of the water and the movement of the trees. Had more time been available, this would have been a nice spot to do some timelapse movies but — as it was — this would have to do:

The following shot is the last one I managed to get before having to head back up the trail to catch the van. Looking at the metadata, the first shot was taken at 11 minutes and 50 seconds past the hour and the last — and 14th — shot was taken at 22 minute and 8 seconds past. My math comes up with that being 10 minutes and 18 seconds on location, and I think I managed to make those extra 18 seconds up on the hike back. At least I wasn’t the last to return to the van.

Yellow-Eyed Penguin encounter

[sponsored post]

It all started when we visited the fossilized forest at Curio Bay on New Zealand’s southeastern coast. In the photo above, you can see one of the ancient, petrified trees that are visible in the rock at low tide. We were told that the endangered Yellow-Eyed Penguins are frequently spotted in the area but that they are usually only making their way between the ocean and their nesting areas at sunrise and sunset. As we were there near mid-day, it was doubtful we would see any. If we did, however, signs instructed visitors to keep at least two car-lengths away to make sure the penguins could go about their business undisturbed.

Wanting to get clear of the bulk of the tourists at the site, I picked up my pace and headed for the far end of the rocky beach where I found some great examples of the petrified logs and stumps and began photographing them. A few moments later, a sound caught my attention and I looked up to see two Yellow-Eyed Penguins emerging from the underbrush at the top of the beach.

One was more bashful and stayed in the shade but, as I continued to photograph them, the other made his way cautiously onto the beach. I picked a location where it looked like he would cross my path, but where he wouldn’t come so close that I would disturb him. Once again — as had happened on several occasions on this trip — I was happy to have brought along my Tamron 18-270mm zoom lens. I hadn’t been expecting to be photographing wildlife at this location and had nearly come to the beach with only a 17-35. Luckily I’d decided otherwise and now the 270mm end of the Tamron was just what I needed.

I wasn’t too aware of what was going on behind me until the penguin had gone and I turned around to leave. It was then that I noticed that a large group of people had assembled behind me and had been photographing the penguins as well. One was a fellow photographer from my group who had, unfortunately, come to the beach with only a 60mm prime lens. He’d made do and gotten some nice shots but he certainly didn’t have as many options available to him as I had.

Here are a couple of shots — first, just as the penguin re-emerged after walking behind a large rock:

That shot’s cropped a bit, but it’s sharp enough to handle it. I mainly cropped it to get rid of some distracting gull poo in the foreground. Proof that you can’t control everything in the scene. The next shot is closer to full frame but is also cropped a small amount just to get rid of some visual noise around the edge of the frame and also to show the penguin a bit better at the small size required by this blog template:

I don’t generally like to crop photos after they are shot. Coming from a background of shooting transparency, I learned to crop in-camera. It was a necessity. I’m only recently embracing the ability to crop and re-frame images in Lightroom or Photoshop. Files captured by modern DSLRs are now large enough that there is some lee-way. You can crop an image down a bit and still have a reasonably large file that will be viable as a stock image. I continue prefer to “get it right” in-camera whenever possible, but it has become a welcome byproduct of digital photography that I can now tweak an image’s crop later to make it stronger. Especially in situations like this where time was limited and I wasn’t able to reposition myself or to get closer just to eliminate some distracting element in the foreground or background.

Resurfacing

After a tough few weeks, I’m returning to a somewhat normal schedule. Some would argue whether I ever operate on a “normal” schedule, but at least things are becoming more normal by my own warped standards. One part of what I like to think of passing as a routine is my morning walk. They’ve been few and far between lately, but the weather — and life — has been cooperating recently and I’m trying to reawaken the habit.

I sometimes build additional purpose into these walks by taking a camera along to experiment with a new lens or technique. On this particular recent walk, I limited myself to my Lensbaby Composer and my D700. The shot at the top of this post was created by swinging the camera downward during a .6 second exposure. I wanted to abstract the scene of grass and tree trunks to its essence and I’m pretty happy with the result. It took more than one try, but this is actually pretty close to what I was looking for.

The shot of the tree was pretty straightforward until I applied some textures in post using Photoshop CS5. And here’s one more Lensbaby shot that sums up the serenity of a pre-dawn stroll:

Rainy day options

I talked a little bit yesterday about how to best handle less than ideal weather situations. My day in Passau was white-skied and a tad dreary. I actually like that kind of weather and think some great shots can be made when there’s a little more “atmosphere” than usual. Unfortunately, from a business sense, my likes are trumped by what sells. I’ll still shoot for myself and make the shots available to publishers, but they’ll typically take those dramatic sunsets or clear blue skies over this:

That’s the Passau I saw last month. Beautiful city, actually. And I had a great time wandering its streets finding incredible vantage point after more incredible vantage point. But… reality sets in and you need to make some photos that will sell, too. Heading inside is one option as seen by the church interior at the top of this post. The softened light from the overcast skies didn’t give those dramatic shafts of light that you might sometimes see streaming through the windows but — with an interior as bright and white as this one — you don’t really need them. The soft light did a great job of modeling all of the ornate features and did so with lower contrast than direct sun would have.

Passau also has a great glass museum. We’re talking about a rambling, multi-story maze of room after room of extraordinary glass. You can seriously get lost in there, but you won’t mind much because there’s good stuff around every corner. The lighting doesn’t look too sympathetic to photography at first. There are all different color temperatures from pink to blue to green. Happily, the auto white balance on my Nikon was able to clean that right up without a second thought from me. I just popped on the 60mm Micro lens and went crazy. Most of the glass was behind glass, but limiting depth of field and blocking the background with my own body allowed me to deal with most reflections. Some of these shots will make nice cutouts (like the one on the right) for those guidebooks that want a little detail shot to break up a long block of copy.

All in all, not bad for a rainy day’s work.

Grimma, Germany

A portrait of a man in a traditional military uniform in the beautiful small town of Grimma on the river Mulde (just east of Leipzig) during a quick stop on the way to Dresden. I’m afraid I was much like an annoying fly to this poor man, as I photographed him from all angles while he stood in the square. I was using my Nikkor 80-200mm zoom, so at least I was a distant fly. This angle with the fall color in the background against his blue uniform turned out to be my favorite. To be honest, he was a great sport and seemed more amused by the attention than annoyed.

Breathing new life

100723bridgepan_sotc

With my recent investment in new hardware and software updates, I’m finally making a real time-investment in putting together my master Lightroom catalog. When I first went digital (after dabbling for a while, I made the serious switch in 2003), I archived all of my RAW files to DVD. Everything that wasn’t ridiculously hopeless got archived. Then I made my tweaks to the best shots and archived those, provided them to stock agencies, etc. My file names are chronological so the only real way of finding things was by searching by the date of the shoot. That, and I had a crude Extensis Portfolio database that provided thumbnails of all of my images and their pathnames, which showed which DVD they were stored on.

That was my system until a year or two ago when I began to migrate to using Adobe Lightroom as my main image cataloging system. I believe it was my trip to China in late 2008 when I began processing everything through Lightroom instead of Bridge and ACR. Everything from that point forward was in Lightroom, but everything prior was still in my old non-system.

Now, as I have downtime between shoots, I’m making the effort to add my digital files from 2003-2008 to my master catalog in Lightroom. After that is done, I’ll need to address my scans from transparencies that predate 2003, but that’s another kettle of fish.

The beauty of re-processing some of these older images is that they can often be improved by the advances made in RAW processing software in the intervening years. The shot at the top of this post is one example. Shot in the fall of 2003 while working on a story about Indiana’s covered bridges, this was originally three vertical shots. The plan was to use them to make a panorama in Photoshop, but it was a time-consuming task at the time.

100723bridge_sotcHere was the situation: This particular covered bridge was located right next to a newer, concrete bridge that replaced it. They were so close together that I couldn’t get the whole bridge in frame with my 17mm lens because there was no room to back up. This photo of the two bridges gives you some idea of the setting.

So, I did what I could do. I backed up under the concrete bridge until it was just out of view. Then I fired off three vertical shots from left to right, making sure I had plenty of overlap along their common edges. I planned at the time to eventually stitch these three photos into a panorama, but I knew it would take some time to correct the wide angle distortion, mask the overlapping edges and tweak the sky and water to get a seamless blend. I set them aside for later.

“Later” came when I imported this shoot into my new Lightroom catalog last week. Seven years have passed and now stitching a panorama is automated. In Lightroom, you can select the three images and go under the Photo menu to Edit In > Merge to Panorama in Photoshop. The software takes it from there and you end up with a seamlessly blended, distortion corrected panorama in no time. Now I have one more covered bridge shot in my library.

Many other tools have been improved in the last seven years and I’ll share some other salvaged photos as I move through the files. It seems like Adobe’s image editing suite has arrived to a point where I can be comfortable making this kind of a huge time commitment to cataloging my images now, without having much worry that I’ll regret taking this path a year or two down the road. Sure, I expect things to continue to improve, but the overall system now feels mature enough to move ahead with confidence that time isn’t being wasted. That’s a good feeling.

Next up: a couple of small things that aren’t completely obvious in Lightroom that make life much easier…

Decade in review: 2000

100101falls_sotc

Happy New Year everyone! This time of year always makes one reflect on the past and I’ve been doing my share. I’ve also realized that this year is a landmark of sorts for me — it marks my first decade as a travel photographer.

Well… that’s not entirely true. I’ve actually been shooting and selling to travel publications for much longer than that but it was more of a side business that I had outside of my full time job. I also shot mostly close to home. All through the ’90s I had been building a very complete library of Kansas stock and in the latter half of that decade (mostly after I quit my job in ’97 and went full-time freelance), I had been steadily expanding my coverage into Nebraska, Iowa, Missouri and the Great Lakes region. But the year 2000 marked a shift — Sally joined Midwest Travel Writers Association and we attended their conference in Vancouver, British Columbia. That organization didn’t allow photographer members but I could attend as the spouse of a writer-member.

100101saturna_sotc

This wasn’t my first international trip, but it was the first international trip I took specifically to shoot travel. It was also my first experience with a travel writers conference which, in some ways, is similar to a press tour. A great first experience. And I ended up with a lot of useful stock as well as a bunch of contacts and new friends. Until this point, I only knew a couple of other stock shooters and they had fairly different areas of interest than mine. It was a huge help to begin to develop a network of other travel shooters and to share ideas and experiences with them. A couple of years later I would join the Society of American Travel Writers (which does have a photographer member category) to continue to broaden that network.

To commemorate the past 10 years, I thought I might share a shot or two from each year here over the next few weeks. Not necessarily my “best shot” from that year, but something showing where that year took me. It’s also a great opportunity for me to re-visit some of my older files and see if they can be re-interpreted a bit with more modern post-processing. These two photos from that trip in 2000 were taken with (I believe) my old Olympus OM-4 and I’m guessing it was on Velvia. I probably used my old work-horse Tamron 28-80 zoom although the dock could have been my Zuiko 24mm lens. The first shot is of Qualicum Falls on Vancouver Island and the second is Saturna Island in British Columbia’s Gulf Islands. The meeting had been held in the city of Vancouver with a post-tour option on Saturna Island. We had driven so we tagged on some exploration of Vancouver Island on our own afterward. A really amazing trip. Standing on the edge of the small car ferry to Saturna and watching the Orcas swimming along just feet away is something I’ll always remember (I still carry that ferry pass in my car for sentimental reasons).

A morning with the alpacas

090929alpaca_sotc

I had one of my more pleasant experiences photographing animals this morning at Ad Astra Alpacas. You know what they say about working with kids or animals. Having been a photographer at a “get your picture taken with Santa” booth years ago, as well art directing plenty of dog-and-cat photo shoots for pet food manufacturers… I have some stories. However, I think the alpaca might be one of my new favorite four-legged subjects.

These guys were very calm and didn’t spook terribly easily as long as I kept my movements slow and steady. One thing I did notice early on was that putting the camera to my face would get them a little nervous. I’d move in close and they’d be fine until the camera came up and then they would shy away a bit. On the other hand, if I held the camera out low, they would become curious and lean in to inspect it. My most successful shots came from shooting blind using this technique with my 17-35 racked out wide and an f-stop of at least f/8 to give me a little depth of field latitude.

This shot was made earlier on when I was still getting the system down. I was at f/3.5 here and got lucky that the focus point caught the eye but I do like the shallow focus on the fence.

Another Saturday Morning

lawrence farmers market

Yesterday morning I was supposed to photograph an encampment of Civil War re-enactors but it was cancelled. I guess the guys couldn’t make it. So, what do you do when you throw a war and nobody comes? Have a good, hearty breakfast. So — as has become this summer’s tradition — it was off to the farmer’s market and ingredient for a blueberry waffle (thanks for the recommendation, Doug!).

I’m continuing to play around with the Lensbaby Composer. Yesterday I popped on the wide angle attachment and the f/5.6 aperture ring. I’m looking for that sweet spot of enough distortion that it looks purposeful while not so much distortion that it renders the image totally abstract. It’s a little fidgety to change out the aperture rings, especially when you’re using the wide angle attachment, so I want to find the right combo and pretty much leave it. I think this is getting pretty close. One of my main uses for this lens is quick food shots in restaurants where the background can’t be free of clutter. The waffle shot is pretty much what I’m looking for.

Update: Here’s a photo of the setup — a Nikon D300 with a Lensbaby Composer and the wide angle attachment (that weird, flared, trumpet-like bit at the end of the lens).

Nikon D300 and Lensbaby