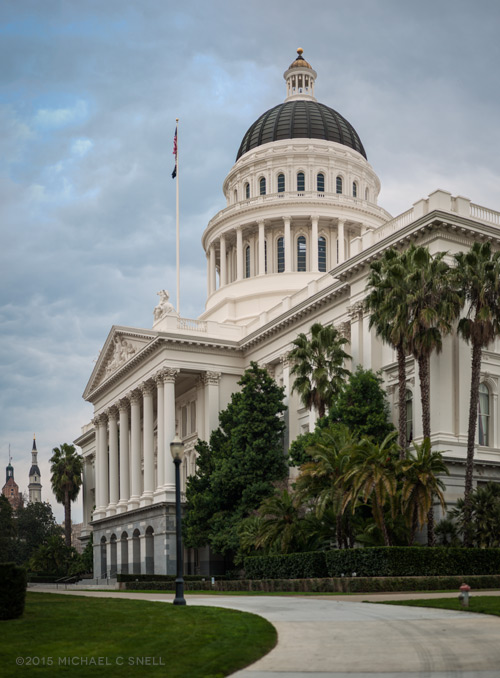
Category Archives: gear

California State Capitol

150212sac_sotc

I’m just getting settled back in from a trip to Sacramento, California, where I attended a board meeting of the Society of American Travel Writers (SATW). In between rain showers and meetings, I did manage to get out and shoot a little. This shot came from a short afternoon outing where I just walked the few blocks around my hotel, limiting myself to just my 85mm Rokinon lens. It was threatening rain, I wanted to travel light, and I sometimes enjoy that limitation of one focal length to force myself to see a bit differently.

But for this shot, I really needed a wide angle. The capitol grounds are filled with trees so there was no “zooming with my feet” for this one. If I stepped back further, my view became obstructed. Instead, I shot a grid of about eight or nine images and stitched them all together later in Photoshop. A nice side benefit is that it resulted in a really large file, should anyone ever want to order a reeeeeeeally large print.

New book and other announcements

Spain_Extremadura_cover

The latest book in my “Journals of a Travel Photographer” series is now available in the Blurb bookstore. Here’s a direct link, or you can visit the store page on my own website for links to this and other books in the series. The Spain book features images from an 8-day trip I made to the Extremadura region of Spain last year. It was my first trip to Spain and I immediately fell in love with the historic cities and Roman ruins found throughout the region. Check out the preview on the Blurb site for more. A Spanish-language version may be following soon.

The Extremadura book has actually been out for a couple of weeks, but I have been late in announcing it here on the blog due to a second trip I just made to Spain — this time to the province of Granada. I also plan on releasing a “Journal” book about this trip in a few months. Several blog posts will feature highlights over the coming days and weeks, as well. For a bit of a preview, however, you can check out my interview that was published in the Tamron e-newsletter last week:

tamron_enews_granada

The story features a few of the photos I made on the Granada trip using the Tamron 18-270mm VC PZD lens. I have also recently received their SP 150-600MM F/5-6.3 Di VC USD for testing — stay tuned for some future posts featuring images from that lens.

So there’s plenty on the way in the coming weeks. I just wanted to make sure I got this plug in for the Extremadura book before inundating you all with images from my more recent Granada trip.

More shallow depth of field

130810printer_sotc

Here are a few more shots taken in Arkansas with my 85mm 1.4. Having a manual focus lens again has been interesting. I used to love manual focus and only grudgingly adopted autofocus when I upgraded film bodies years ago to get other features. I’m enjoying a return to that slower, more thoughtful way of shooting but I am finding that changes in my own eyesight and in camera viewfinders have added some additional challenge. Not to mention that at f/1.4 you get very little wiggle room. That plane of focus can be wafer thin.

The big viewfinder on my D700 is pretty manual-focus friendly but I do miss my old split-view finders. I’ve looked at options online for getting a replacement focusing screen, but I’ve seen enough comments from people who have experienced exposure issues that I’m not sure it’s worth it to me. Instead, I think I’ll just continue to practice, practice, practice. I also think I’ll try and rely more on my eye and less on the focus-confirmation dot in the viewfinder that tells you when you’re sharp. I’m not so sure that it isn’t “drifting” a bit depending on my subject distance. It must be the camera – it couldn’t be me, right?

130810wedding_sotc

Above: I happened on this beautiful lakeside wedding location, just after the ceremony had finished. Below: a few shots of people hunting for diamonds at Crater of Diamonds State Park.

130810diamond2_sotc 130810diamond1_sotc

Simplifying the frame: Clinton birthplace home NHS

130804clinton3_sotc

On a recent visit to the President William Jefferson Clinton Birthplace Home National Historic Site in Hope, Arkansas, I decided to take a different approach to my photography. It’s easy to develop habits and a common one is to see “interior” and immediately think “wide angle.” After all, I carry that wide angle for just that reason — if I’m in a tight space, I can still get it all in the frame — right?

Here’s a typical shot from starting with that mindset:

130804clinton1_sotc

But the more I thought about it in this case, the more I realized that the architecture isn’t the point. The real spirit of the place was in the details: the childhood photos, the everyday items, the memories. After I had all of the wide shots I needed, I popped on my new Rokinon 85mm 1.4 and took a fresh look at things. The image at the top of the post and the three that follow were all made with the 85mm.

That short telephoto view changed how I saw things. It forced me to simplify. What was a chaotic mixture of patterns through the 17mm was now reduced and dreamy — thanks to the shallow depth of field. The images felt more like I felt, when touring the house. I’ve toured a lot of presidential museums and boyhood homes but this one was more personal for me, probably due to the fact that it resembled my own boyhood home so much. It was very nostalgic for me and I think that came through in the images. I’ll definitely not disregard a short telephoto when shooting interiors from now on.

130804clinton4_sotc

130804clinton2_sotc

Testing a new lens

130603lenstest7_sotc

Gear is a funny thing. You can become obsessed with it — always wanting the newest, the fastest, the most megapixels — but it’s a trap. At least I feel that it can be a distraction from paying attention to the things that really matter: composition, mood, light, message.

I don’t buy new gear all that often and I try and really think through and make purchases that will last. I’ve had a solid stable of bodies and lenses for a while now and have the whole range of focal lengths covered from 17mm to over 400mm (if you consider the 1.5x of my crop-sensor D7000).

So what more could I want or need?

I’ve thought about this a lot lately and have decided that what I’m looking for now are not necessarily the tools that test out as having the “best quality,” but rather tools that have a “unique quality.” It’s a fine distinction, but what I’m looking for are a few lenses, in particular, that have a uniqueness about them. They deliver something special. They may not be the most expensive, rugged or sharpest, but they will bring a capability to my kit that I didn’t have before.

My most recent addition arrived on Saturday: a Rokinon 85mm f/1.4. I took it out for a quick walk around the KU campus yesterday to see what it could do. I was drawn to this lens for the shallow depth of field and creamy bokeh (out of focus areas). It’s manual focus as well, which slows me down and makes me more thoughtful. So far, I’m not disappointed. See what you think of these initial test shots:

130603lenstest6_sotc

130603lenstest1_sotc

130603lenstest5_sotc

130603lenstest4_sotc

The Jayhawk shot above is actually stitched from 18 images in a pano-grid method I’ve written about before. It lends the shallow depth of field to a wider angle of view.

130603lenstest2_sotc

These last two shots are of mounts on display in the Natural History Museum — they’re not wildlife shots. I was just looking for some tighter settings to try the close focus and shallow depth of field:

130603lenstest3_sotc

130603lenstest8_sotc

So far, I’m impressed and happy with my purchase — and anxious to get this lens out in the field for some real travel work.

Shooting tethered

130323robot_sotc

It’s snowing outside so I’m playing indoors today.

I’ve been setting up my new 13″ Retina MacBook Pro and ran across an article about shooting tethered in Lightroom 4. I thought I’d give it a try, even though I only do a small amount of studio photography compared to field work. For some reason I always thought that tethering would be a lot more involved than it turned out to be. In fact, all I needed was a USB cable to connect my Nikon D700 to my MacBook. Turn on the camera and open Lightroom and, under the “file” menu, you can initiate tethering. Lightroom found the camera automatically and in no time I had a little toolbar added to my Lightroom interface that showed my camera settings: shutter speed, aperture, white balance, etc. Here’s a glimpse of the setup:

130323robot2_sotc


The Lightroom toolbar has a shutter button so you can fire the camera from the laptop. Hit the button and the camera makes an exposure that is immediately transferred to the laptop and opened for review right there in Lightroom.

I know. Lots of photographers have been doing this for years and it’s nothing new, but it was a revelation how easy it was to set for a first-time user like me. I’m reminded of the first time I realized that my Nikon had a built-in intervalometer for shooting time-lapses. More and more often, features that used to be costly added expenses are now built into modern gear, although sometimes they’re not heavily promoted. It pays to noodle around a bit every now and then to see what wonders are hiding in those electronics.

You know, I was thinking that this tethering feature wouldn’t be all that useful in the field but, now that I think about it, it could be extremely handy when doing things like night photography. I know when I was shooting the Milky Way in western Kansas last summer, it would have been nice to have had a way to be able to check exposure and focus during the shoot better than I was able to do on the camera LCD. The USB cable travels with me anyway, so this capability comes at no extra expense, weight, or bulk. Just the kind of thing I like.

Wind power

It seems like so much that I shoot lately can’t be posted to this blog right away because I need to wait until the images have appeared in the magazines that assigned me. I have lots of fun stuff to show — it will just have to wait. Some should be opening up soon, however, so hold tight.

Last week was a fun assignment that wasn’t for a publication so I can talk a little about it. I spent three days shooting wind farms, turbine plants and holding yards for the Kansas Department of Commerce. These are the kinds of assignments that make me love my job. Being a photographer opens up worlds that you’d never know about otherwise. Seeing how these giant windmills are built, transported and erected was fascinating. The sheer size is hard to comprehend — even when seeing the finished turbine in a field. It’s when you walk around the various parts and components as they wait to be assembled that you realize just how massive they really are.

The shot above was taken at a new wind farm being built near Spearville, Kansas. The sky was deep enough blue that I thought I might be able to get a little blur on the blades by using my ND filter. At faster shutter speeds, the blades are crisp and you can’t tell whether they are turning or not. A little blur seemed important for showing the turbines in action and in speaking to the energy that they create. In the end, I stacked both my ND filter and my polarizer on my 17-35 in order to cut out enough light to lower the shutter speed down to 0.4 seconds. Just enough to do the trick.

I’ll have more from this shoot in the coming days.

Operation Albatross

[sponsored post]

The next posts will explore the Otago Peninsula on New Zealand’s South Island. Dunedin is located where the peninsula joins the mainland and at the far tip of the peninsula is the Royal Albatross Centre, where I was to play wildlife photographer for the afternoon and try and get at least one decent shot of a Royal Albatross. I say “play” at being a wildlife photographer because I have the utmost respect for photographers who specialize in this field and I know that my infrequent dabbles of an hour or two don’t even come close to the kind of commitment, stamina and determination that it actually takes to get a really beautiful wildlife shot.

The Royal Albatross is listed as an endangered species and Taiaroa Head, where the Royal Albatross Centre is located, is the only mainland breeding colony near human occupation. These are large birds with wingspans reaching 10 feet. They live mainly at sea, coming to land pretty much just to lay eggs and raise their young. If I remember correctly, I believe our guide said that they don’t visit land at all for the first five years of life.

The image above is not of an albatross colony, but of a group of Red Billed Gulls. These birds covered the hillside as we approached the Royal Albatross Centre and gave hope that our search for an albatross might be an easy one. Not that easy, we would come to learn. The Centre is a fantastic place for learning about the albatross and other regional wildlife, but as is usually the case with wildlife, some days are always better than others for viewing wild birds in their natural habitat. A good hike up a steep slope to a viewing area that had been made from a WWII bunker led to this view of our first albatross through some very scratched plexiglass:

Yeah.

That white shape on the left is a nesting albatross. The birds were just returning for the beginning of their nesting season but they were still few and far between. This was the only one we could spot and it was pretty clear that this was not going to be the way I was going to get my albatross shot today. Luckily there was a part two to this excursion and we next made our way to the Monarch and out into the Pacific.

I’ve been on a few boats like this for various whale-watching trips, etc., and I’ve learned a couple of things about shooting from them. One, take the longest glass you have because you’ll never be as close as you want (although the optimist in me tells me to keep a second body around my neck with a wide angle just in case we have a freak encounter and a whale pops up right next to the boat). Birds only enhance the requirement for long glass as I learned one long winter’s night in a blind on the Platte River in central Nebraska — but that’s another story. Lesson two, be prepared for a bumpy ride.

And today’s ride was a bit bumpy. Or maybe “rocky” and “roll-y” is a more apt description. Once out on the big water, our little boat was riding 9 foot swells like a Coney Island roller coaster. I tried to capture these swells in a photo, with limited success:

You can kind of see the sharp foreground swell with another, more distant, swell out-of-focus in the distance but you really can’t decipher it without some sense of scale. Oh well, trying to photograph that occupied my time until the albatross was spotted.

There had been a couple of sightings earlier that were more distant and it seemed that the birds were always moving away from us but, this time, I heard the captain say that there was an albatross on my side of the boat and he was coming toward us.

I had positioned myself in a narrow walkway on the side of the boat where I could push my lower back against a wall and have a foot out forward against the rail to give me some stability with my hands free. “Some” stability. Remember that we’re diving over swell after swell and anything put on a flat surface wouldn’t stay put for a second. I had also tried to reduce my top-heaviness by not bringing the full backpack. I’m primarily relying on my Nikon D7000 and the Tamron 18-270mm zoom. At the 270 end, it’s the largest glass I carry — the next closest being my Nikkor 80-200. With the smaller sensor of the D7000, the Tamron is the approximate equivalent of a 400mm lens. A true bird photographer would probably consider this to be just barely enough but it was all I had and I was making the most of it. I also appreciated the Tamron’s compactness and low weight. Hand-holding a fast, 400mm prime lens with all the weight that a fast lens brings would have been a challenge. The Tamron isn’t as fast as my 2.8 Nikkor, but I made up for this by increasing my ISO to 800 to get some of the shutter speed back that I was losing to a slower lens. At ISO 800, I was able to get a shutter speed of 1/2500th of a second at f/6.3. And that did the trick. It gave me a fast enough shutter to overcome the rocking of the boat and — maybe I forgot to mention this — the potential 75mph speed that the bird can achieve.

The Albatross appeared over a swell and, as predicted, headed toward us and slowly arced his path across the back of the boat. As it approached, I fired off several shots — trying to regain auto-focus a couple of times throughout the burst, just to make sure I’d get something sharp. This was another lesson I’d learned on a whale-watching excursion when a fluke appeared, beautifully backlit, and my autofocus slipped off and grabbed the background as the boat rocked and I ended up with a bunch of useless images of a fuzzy whale tail with a tack-sharp cliff in the background. Lesson learned.

This time I tried to concentrate on following the bird’s path and fire-fire-fire, re-check focus, fire-fire-fire, re-check focus, fire-fire-fire… and then… that was it. We had a couple more albatross sightings but none quite that close. Thanks to the Tamron 18-270, this albatross had been close enough that I got a few shots like these — the first only lightly cropped to straighten the horizon and the second cropped a bit more:

I’m not typically selling to a wildlife market. For my purposes, I just really want to have images in the file that help tell the story of a place. These albatross shots show the bird and a bit of the environment. That works. If someone needs a shot of a nest, eggs hatching, etc., I’m glad to leave that sale to the wildlife guys that have the patience to get those shots. It takes a lot of work on their part and I know I’m not going to compete with their images with what I get on a 2-hour boat trip. Still, I’m happy to have gotten the shots that I did and it was a great day to be out on the water enjoying this beautiful place. The Otago Peninsula is absolutely magnificent and I could have easily spent weeks there. Unfortunately, I only had a couple of days this time. I’ll show you more of those two days in the coming posts — as well as another spot where the Tamron saved me on a wildlife surprise.

Packing light

As I prepare to leave for New Zealand, I’m mentally working my way through some new packing ideas. It’s a difficult balance to make sure you’re prepared for whatever might come your way on an international shoot and yet not overpack to the point that you are crippled by your own gear. In the past I’ve loved traveling with a backpack but then I began to realize that, while I had everything I needed in my pack, I didn’t often go to the trouble to take it off to get into my gear. When you have two cameras around your neck getting tangled in backpack straps, it’s not that convenient. A while ago I wrote about switching to a ThinkTank sling bag. It’s a little smaller than my backpack so it forces me to edit my gear a little right off the bat, but the real convenience comes from being able to swing it around and access it without taking it off. So far it has been working well.

On this trip, I’m adding another new element: a Scottevest. This thing is loaded with pockets of all sizes and most of them are secured with zippers. I’m hoping that it will work well for getting a lot of my little gadgets (ipod, headphones, paperback, phone, magazines, etc.) through the airports. It gets them out of my camera bag but doesn’t add another carryon. Then, once on location, I hope to often be able to leave the bag behind for a day and just load those same pockets up with small lenses, flash, filters, etc.

I’d better get back to some actual packing now but I’ll report back on how everything is working when I get some miles behind me. I hope to post from the road but, if that’s not possible, I’ll have plenty to share when I’m back.